3 Easy and Fun Crafts for Children

For parents and teachers, having a catalog of easy and fun crafts for children on hand is a great solution. You can use it to plan a family afternoon of creativity at its best, or at school, so that children can break away from the routine while learning through play.
What’s great about arts and crafts is that children don’t perceive them as educational content, but we know that they are. And they offer the following benefits:
- Activating creativity
- Stimulating the development of motor skills
- Addressing content such as recycling, reuse, reduction, and various subjects
- Helping children learn to share and socialize
- Allowing children to achieve goals and thereby strengthen their self-confidence
Easy and fun crafts
With elements we have at home that are easy and safe to handle, children can create many things. Using recycled cardboard – such as cereal boxes, toilet paper rolls, shoe boxes, etc. – they can assemble all kinds of creations. As an example, here’s a model of a cardboard toy:

Rocket to the moon
In general, children find the idea of outer space fascinating. With that in mind, here’s an easy and fun craft idea that will allow your kids to make their own rocket.
Elements needed
- 1 cardboard tube from a paper towel or toilet paper roll
- 1 sheet of posterboard or construction paper
- Paint
- Glue
- Scissors
- Ruler
- Shiny stickers
Step by step
- Wrap the cardboard tube with posterboard/construction paper and stick it with the glue.
- From one edge to the inside of the tube, make four cuts about 3 inches deep, which are at equal distance dividing the circular base of the tube in 4.
- Cut 2 cardboard triangles from a cereal box, about 4 inches high and 5 inches wide.
- Also, cut a circle of 4 centimeters in diameter. Cut it in half and turn it into a cone.
- Paint the triangles and the cone whatever color you like.
- Place the two triangles in the cuts you made at the base of the tube and glue the cone at the other end.
- Write your name on the rocket and put shiny stickers or other decorations on it to make it look great!
Theme and fun crafts
Children love the Christmas season, so it’ll be great to have them decorate the house with some of their crafts. Here’s a simple and very cheerful ideal:
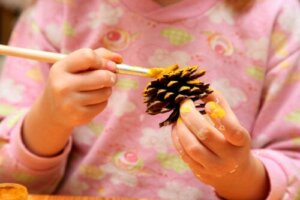
Christmas tree with a pineapple, one of the best easy and fun crafts for children
This is a craft that can become a very nice centerpiece!
Necessary elements
- 1 pineapple that has a triangular shape (with a flat base so that it stands up)
- Cardboard
- Modeling clay
- Glue
- Glitter
- Cotton
- Transparent thread or fish line
- Colorful beads
- A golden bow
- Spray paint (optional)
Step by step
- Cut a cardboard base, glue the cotton on it and stick the base of the pineapple on it. If you want, you can spray paint it first to make it more attractive (this is optional).
- Put glue and glitter on some of the tips of the pineapple.
- Make a garland stringing the beads with your thread. Tie the ends together.
- Place it around the pineapple and glue some beads so that the mini garland stays in place.
- Stick a golden bow on the end.
- Sprinkle everything with glitter so that it shines and stands out on the table!
Easy and fun crafts for learning
The crafts serve as a didactic resource to teach many things: Time, the solar system, interactive maps, and thousands of other things.
An analog clock
A very simple thing you can make is a cardboard clock to help children learn about time.

Necessary elements
- Stiff cardboard
- Pencil
- Markers
- Glue
- 1 two-legged metal brad
- Scissors
- Ruler
Step by step
- Cut a cardboard circle that’s 12 inches in diameter.
- Divide the circle into quarters with a ruler and a pencil.
- Divide each quarter into three. There should be 12 divisions altogether.
- Use the marker to mark the end of the lines about 1 inch from the edge.
- Write the numbers 1, 2, 3, 4, 5, 6, 7, 8, 9, 10, 11 and 12 on the marks, just as they appear on a clock.
- Another option is to look for a template on the internet, print it out and paste it on the cardboard.
- Cut out two cardboards in the shape of an arrow at one end, one shorter (4 inches) and one longer (5 inches).
- Punch the center of the cardboard where all the pencil lines intersect and attach the two superimposed needles with the brad by sticking the two legs through the holes.
- Open the legs of the brad from the back.
- Now you have a clock with the movable hands so your little ones can learn to tell time!
To complete this manual you can cut a 12 x 4 inch cardboard rectangle and mark the mid-point (6 inches) with a marker. There, the children can use toothpicks to write out the time they see on the clock digitally. This is a good way to explain the two ways in which the same time is written.
Creativity, fun and ecology while learning
The DIY universe is infinite and you can take advantage of it in a thousand different ways. When you put together an afternoon of fun doing children’s crafts or spend an hour in class doing these types of tasks, the results are always positive. Kids learn and, at the same time, care for the environment.
So, making fun and easy crafts for kids is a smart choice for everyone. What are you waiting for to get started?
For parents and teachers, having a catalog of easy and fun crafts for children on hand is a great solution. You can use it to plan a family afternoon of creativity at its best, or at school, so that children can break away from the routine while learning through play.
What’s great about arts and crafts is that children don’t perceive them as educational content, but we know that they are. And they offer the following benefits:
- Activating creativity
- Stimulating the development of motor skills
- Addressing content such as recycling, reuse, reduction, and various subjects
- Helping children learn to share and socialize
- Allowing children to achieve goals and thereby strengthen their self-confidence
Easy and fun crafts
With elements we have at home that are easy and safe to handle, children can create many things. Using recycled cardboard – such as cereal boxes, toilet paper rolls, shoe boxes, etc. – they can assemble all kinds of creations. As an example, here’s a model of a cardboard toy:

Rocket to the moon
In general, children find the idea of outer space fascinating. With that in mind, here’s an easy and fun craft idea that will allow your kids to make their own rocket.
Elements needed
- 1 cardboard tube from a paper towel or toilet paper roll
- 1 sheet of posterboard or construction paper
- Paint
- Glue
- Scissors
- Ruler
- Shiny stickers
Step by step
- Wrap the cardboard tube with posterboard/construction paper and stick it with the glue.
- From one edge to the inside of the tube, make four cuts about 3 inches deep, which are at equal distance dividing the circular base of the tube in 4.
- Cut 2 cardboard triangles from a cereal box, about 4 inches high and 5 inches wide.
- Also, cut a circle of 4 centimeters in diameter. Cut it in half and turn it into a cone.
- Paint the triangles and the cone whatever color you like.
- Place the two triangles in the cuts you made at the base of the tube and glue the cone at the other end.
- Write your name on the rocket and put shiny stickers or other decorations on it to make it look great!
Theme and fun crafts
Children love the Christmas season, so it’ll be great to have them decorate the house with some of their crafts. Here’s a simple and very cheerful ideal:
Christmas tree with a pineapple, one of the best easy and fun crafts for children
This is a craft that can become a very nice centerpiece!
Necessary elements
- 1 pineapple that has a triangular shape (with a flat base so that it stands up)
- Cardboard
- Modeling clay
- Glue
- Glitter
- Cotton
- Transparent thread or fish line
- Colorful beads
- A golden bow
- Spray paint (optional)
Step by step
- Cut a cardboard base, glue the cotton on it and stick the base of the pineapple on it. If you want, you can spray paint it first to make it more attractive (this is optional).
- Put glue and glitter on some of the tips of the pineapple.
- Make a garland stringing the beads with your thread. Tie the ends together.
- Place it around the pineapple and glue some beads so that the mini garland stays in place.
- Stick a golden bow on the end.
- Sprinkle everything with glitter so that it shines and stands out on the table!
Easy and fun crafts for learning
The crafts serve as a didactic resource to teach many things: Time, the solar system, interactive maps, and thousands of other things.
An analog clock
A very simple thing you can make is a cardboard clock to help children learn about time.

Necessary elements
- Stiff cardboard
- Pencil
- Markers
- Glue
- 1 two-legged metal brad
- Scissors
- Ruler
Step by step
- Cut a cardboard circle that’s 12 inches in diameter.
- Divide the circle into quarters with a ruler and a pencil.
- Divide each quarter into three. There should be 12 divisions altogether.
- Use the marker to mark the end of the lines about 1 inch from the edge.
- Write the numbers 1, 2, 3, 4, 5, 6, 7, 8, 9, 10, 11 and 12 on the marks, just as they appear on a clock.
- Another option is to look for a template on the internet, print it out and paste it on the cardboard.
- Cut out two cardboards in the shape of an arrow at one end, one shorter (4 inches) and one longer (5 inches).
- Punch the center of the cardboard where all the pencil lines intersect and attach the two superimposed needles with the brad by sticking the two legs through the holes.
- Open the legs of the brad from the back.
- Now you have a clock with the movable hands so your little ones can learn to tell time!
To complete this manual you can cut a 12 x 4 inch cardboard rectangle and mark the mid-point (6 inches) with a marker. There, the children can use toothpicks to write out the time they see on the clock digitally. This is a good way to explain the two ways in which the same time is written.
Creativity, fun and ecology while learning
The DIY universe is infinite and you can take advantage of it in a thousand different ways. When you put together an afternoon of fun doing children’s crafts or spend an hour in class doing these types of tasks, the results are always positive. Kids learn and, at the same time, care for the environment.
So, making fun and easy crafts for kids is a smart choice for everyone. What are you waiting for to get started?
All cited sources were thoroughly reviewed by our team to ensure their quality, reliability, currency, and validity. The bibliography of this article was considered reliable and of academic or scientific accuracy.
- EDUCREA. (2015). Los beneficios de las manualidades para niños. Recuperado de https://educrea.cl/los-beneficios-de-las-manualidades-para-ninos/.
- Fundación Biodiversidad: https://fundacion-biodiversidad.es/es/content/el-juego-del-reciclaje https://fundacion-biodiversidad.es/sites/default/files/reciclaje_responsive.html
- INSTITUTO DE ECOLOGÍA DE MEXICO. INECOL: https://www.inecol.mx/inecol/index.php/es/2013-06-05-10-34-10/17-ciencia-hoy/413-las-tres-r-una-opcion-para-cuidar-nuestro-planeta
This text is provided for informational purposes only and does not replace consultation with a professional. If in doubt, consult your specialist.


