Crafts for Kids Using Bottle Tops: 4 Ideas
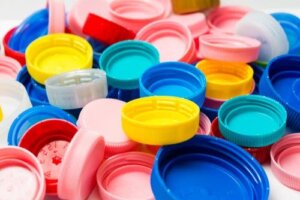
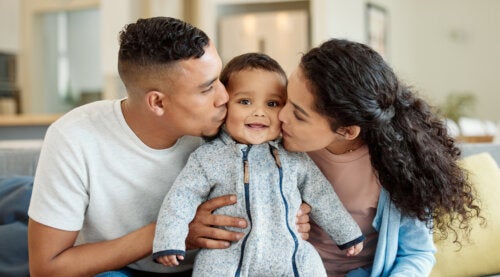
Crafts are a perfect activity to enjoy over a lazy weekend with your family or a cold winter afternoon indoors. With that in mind, we want to suggest a series of very simple crafts for kids using bottle tops. Not only are they fun, but they’re budget-friendly as well. So, it’s time to gather all the tops you have in your house and get ready to create.
4 ideas to make crafts for kids using bottle tops
1. A pencil holder
If you have a lot of bottle tops to work with, then making a pencil holder can be an activity that’s both fun and practical. When you’re done, your children will be able to display and make use of their creation. All you need is enough bottle tops to create the shape of a pencil holder by piling them on top of one another.
In this case, we recommend using a glue that’s strong enough to keep the bottle tops from falling apart. You don’t need to coat the tops with glue – just make sure to use enough to stick each top to the ones next to it and allow to dry.
To keep each column of tops completely straight, you can put a ruler behind them horizontally as you glue them together.
2. Discovering animals
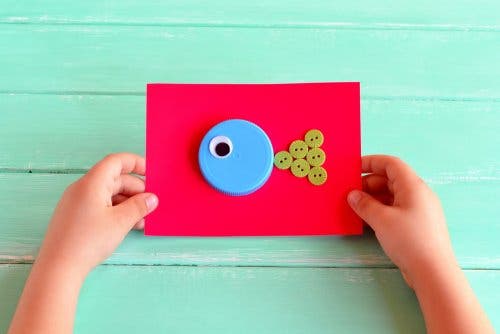
Another one of our favorite crafts for kids using bottle tops is perfect for small children, both at home or at school. Depending on how many tops you have, you can create a variety of animals. Each bottle top will represent a different animal.
Besides bottle tops, which will be the base of each animal, you’ll need googly eyes and EVA foam. That way, you can decorate each animal according to its unique characteristics.
In order for this craft to last as long as possible, we suggest putting each top on some sort of support. For example, you can use posterboard or just recycled cardboard. That way, transporting them will be much easier.
One idea is to make a fish. To do so, you’ll use a bottle top as the head, and then add a tail using cardboard or EVA foam to add the tail. You’ll also need to add a googly eye, as we mentioned above.
As you’ll quickly discover, the possibilities are endless. With something as simple as a bottle top, you and your little ones can create any creature in the animal kingdom. So, as you create, your children will also be participating in the learning process.
3. Flowers
Flowers are always synonymous with happiness, sunshine, and good weather. Therefore, your little ones are going to love this flower craft. To make it, you’ll need the following materials:
- 7 bottle tops of the same color for your base.
- Another 7 bottle tops of a different color for the petals.
- One bottle top of another color.
- Wire.
- Glue.
The tops we mentioned should all have the same size to keep your flower from being lopsided. Now, the first thing you need to do is glue the first 7 tops that make up your base. To do so, put one in the center and glue the other 6 around it.
Once you have your foundation, you’ll use the other 8 tops you prepared. First, glue down the one that’s a different color in the center. Then, glue the remaining 7 tops around it, creating the petals of a flower.
Finally, you’ll need to bend the wire in the form of a loop and glue one end to the base and the other to the petals. Now, you’ll be able to enjoy your flower all year round.
4. Christmas crafts for kids using bottle tops
During the Christmas season, many families enjoy creating their own decorations, which are fun and easy to make. On this occasion, we’ll teach you how to make a snowman in no time, using materials you already have around the house.
For this snowman craft, you’ll need:
- Three white bottle tops, in three slightly different sizes.
- EVA foam.
- Blue posterboard.
- Glue.
- Small blue buttons or beads.
First of all, place the three white bottle tops on the blue poster board. You’ll use the smallest tops for the snowman’s head, the medium top for the torso, and the largest top will be the base of your snowman. In other words, you’ll line them up vertically, with the smallest on top and the largest at the bottom.
The following step will involve decorating your snowman. Glue your blue buttons or beads in a vertical line on the middle bottle top, and then create the details of your snowman’s face. And don’t forget to give your snowman a hat and scarf and a nose in the shape of a carrot!
Crafts are a perfect activity to enjoy over a lazy weekend with your family or a cold winter afternoon indoors. With that in mind, we want to suggest a series of very simple crafts for kids using bottle tops. Not only are they fun, but they’re budget-friendly as well. So, it’s time to gather all the tops you have in your house and get ready to create.
4 ideas to make crafts for kids using bottle tops
1. A pencil holder
If you have a lot of bottle tops to work with, then making a pencil holder can be an activity that’s both fun and practical. When you’re done, your children will be able to display and make use of their creation. All you need is enough bottle tops to create the shape of a pencil holder by piling them on top of one another.
In this case, we recommend using a glue that’s strong enough to keep the bottle tops from falling apart. You don’t need to coat the tops with glue – just make sure to use enough to stick each top to the ones next to it and allow to dry.
To keep each column of tops completely straight, you can put a ruler behind them horizontally as you glue them together.
2. Discovering animals
Another one of our favorite crafts for kids using bottle tops is perfect for small children, both at home or at school. Depending on how many tops you have, you can create a variety of animals. Each bottle top will represent a different animal.
Besides bottle tops, which will be the base of each animal, you’ll need googly eyes and EVA foam. That way, you can decorate each animal according to its unique characteristics.
In order for this craft to last as long as possible, we suggest putting each top on some sort of support. For example, you can use posterboard or just recycled cardboard. That way, transporting them will be much easier.
One idea is to make a fish. To do so, you’ll use a bottle top as the head, and then add a tail using cardboard or EVA foam to add the tail. You’ll also need to add a googly eye, as we mentioned above.
As you’ll quickly discover, the possibilities are endless. With something as simple as a bottle top, you and your little ones can create any creature in the animal kingdom. So, as you create, your children will also be participating in the learning process.
3. Flowers
Flowers are always synonymous with happiness, sunshine, and good weather. Therefore, your little ones are going to love this flower craft. To make it, you’ll need the following materials:
- 7 bottle tops of the same color for your base.
- Another 7 bottle tops of a different color for the petals.
- One bottle top of another color.
- Wire.
- Glue.
The tops we mentioned should all have the same size to keep your flower from being lopsided. Now, the first thing you need to do is glue the first 7 tops that make up your base. To do so, put one in the center and glue the other 6 around it.
Once you have your foundation, you’ll use the other 8 tops you prepared. First, glue down the one that’s a different color in the center. Then, glue the remaining 7 tops around it, creating the petals of a flower.
Finally, you’ll need to bend the wire in the form of a loop and glue one end to the base and the other to the petals. Now, you’ll be able to enjoy your flower all year round.
4. Christmas crafts for kids using bottle tops
During the Christmas season, many families enjoy creating their own decorations, which are fun and easy to make. On this occasion, we’ll teach you how to make a snowman in no time, using materials you already have around the house.
For this snowman craft, you’ll need:
- Three white bottle tops, in three slightly different sizes.
- EVA foam.
- Blue posterboard.
- Glue.
- Small blue buttons or beads.
First of all, place the three white bottle tops on the blue poster board. You’ll use the smallest tops for the snowman’s head, the medium top for the torso, and the largest top will be the base of your snowman. In other words, you’ll line them up vertically, with the smallest on top and the largest at the bottom.
The following step will involve decorating your snowman. Glue your blue buttons or beads in a vertical line on the middle bottle top, and then create the details of your snowman’s face. And don’t forget to give your snowman a hat and scarf and a nose in the shape of a carrot!
This text is provided for informational purposes only and does not replace consultation with a professional. If in doubt, consult your specialist.