Making a Diaper Basket: Step by Step
We’re going to teach you how to make a diaper basket step by step. You can use it to include a few useful things for the baby, such as pacifiers and diaper creams.
When the time comes to welcome a new baby, there are thousands of gifts you can make. However, it can be difficult to find a creative option.
You’ve probably already heard about diaper baskets. They’re a wonderful choice that new parents will love.
They’re also a very economical choice. Not to mention you get to bring out your creative side while making them. If you have kids, they’ll really enjoy helping out with this unique gift as well.
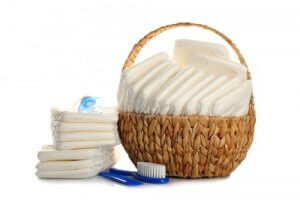
Materials for making a diaper basket
You may think you need a lot of materials to make a diaper basket. However, everything you need is easy to find and doesn’t cost much. Below is a list of what you’ll need:
- 1 package of diapers
- Basket
- Elastic band
- Flowers or a stuffed animal
- Tape, ribbons, and decorations
- Glue
- Rubber band
- Pool noodles
- Scissors
Steps
Now that you know what you’ll need, it’s time to learn the steps to make a magnificent diaper basket:
Step one
The first thing you need to do to make a diaper basket is get together all the materials listed above. Next, wrap the basket in a colorful elastic band to brighten it up.
You can use pins to attach the ribbon as you go along. You can even use hot glue to attach flowers or little stuffed animals. This will give the basket a touch of fantasy.
Step two
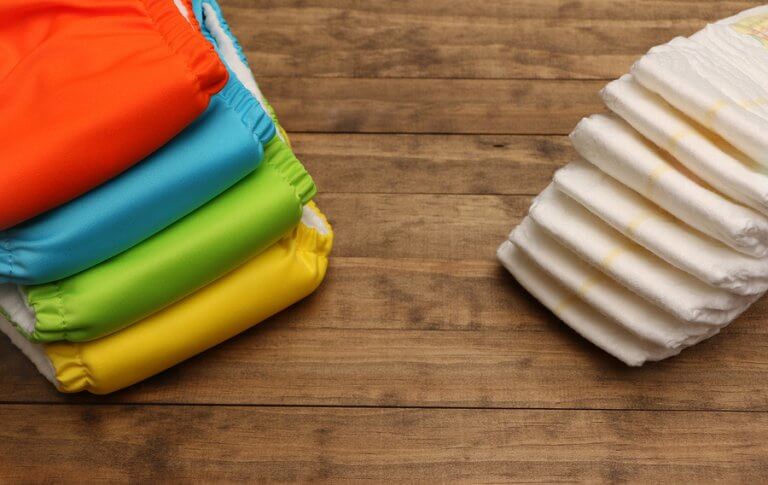
Start by taking a diaper and rolling it up from the bottom to the top, where the waistline is. Make enough of these rolls to go all the way around the edge of the basket.
Then group the diapers in groups of 3 and secure them with a rubber band. When you finish, put together all the pieces to create a circle going all around the outside of the basket you’ve chosen.
“You will never find a deeper, more selfless, or true tenderness than that of your mother.”
–Honoré de Balzac–
Step three
Once all the diapers are around the edge, use another elastic band to make sure all the diapers are perfectly connected to form a circle.
Next, tie a bow on the front and add any decorations you choose. For example, you could glue something to the outside, like animal stickers.
Step four
The next step is to make the handles for the basket. It’s simple: you just need to cut the pool noodles to the length you want. Remember that they should be in proportion to the basket. You don’t need to use paint to decorate them.
Just use green or black duct tape to decorate them. You just need to be sure you cover all the pool noodle foam as elegantly as possible.
Once you have everything covered, add it to the basket starting at one end. Use hot glue to attach the handles. If you want, you can make a bow with a decorative ribbon on the side of the basket.
Step five
After filling the inside of the basket with tissue paper, you’ve reached the most fun step of all. Once you have the basket almost finished, you can put in some gifts for the newborn. For example, you can put in some pacifiers, socks, diaper cream, baby wipes, plastic spoons, etc.
At this point, you just need to worry about spreading out the objects so you can use the space available as efficiently as possible.
To finish, remember that making a diaper basket as a gift is very simple. You just need to follow a few steps and you’ll be ready to welcome a new baby, whether yours or someone else’s.
On top of that, you’ll enjoy making it. As you’ll have seen, you can personalize the basket to the max. Let your imagination fly and surprise yourself with a creative craft!
We’re going to teach you how to make a diaper basket step by step. You can use it to include a few useful things for the baby, such as pacifiers and diaper creams.
When the time comes to welcome a new baby, there are thousands of gifts you can make. However, it can be difficult to find a creative option.
You’ve probably already heard about diaper baskets. They’re a wonderful choice that new parents will love.
They’re also a very economical choice. Not to mention you get to bring out your creative side while making them. If you have kids, they’ll really enjoy helping out with this unique gift as well.
Materials for making a diaper basket
You may think you need a lot of materials to make a diaper basket. However, everything you need is easy to find and doesn’t cost much. Below is a list of what you’ll need:
- 1 package of diapers
- Basket
- Elastic band
- Flowers or a stuffed animal
- Tape, ribbons, and decorations
- Glue
- Rubber band
- Pool noodles
- Scissors
Steps
Now that you know what you’ll need, it’s time to learn the steps to make a magnificent diaper basket:
Step one
The first thing you need to do to make a diaper basket is get together all the materials listed above. Next, wrap the basket in a colorful elastic band to brighten it up.
You can use pins to attach the ribbon as you go along. You can even use hot glue to attach flowers or little stuffed animals. This will give the basket a touch of fantasy.
Step two
Start by taking a diaper and rolling it up from the bottom to the top, where the waistline is. Make enough of these rolls to go all the way around the edge of the basket.
Then group the diapers in groups of 3 and secure them with a rubber band. When you finish, put together all the pieces to create a circle going all around the outside of the basket you’ve chosen.
“You will never find a deeper, more selfless, or true tenderness than that of your mother.”
–Honoré de Balzac–
Step three
Once all the diapers are around the edge, use another elastic band to make sure all the diapers are perfectly connected to form a circle.
Next, tie a bow on the front and add any decorations you choose. For example, you could glue something to the outside, like animal stickers.
Step four
The next step is to make the handles for the basket. It’s simple: you just need to cut the pool noodles to the length you want. Remember that they should be in proportion to the basket. You don’t need to use paint to decorate them.
Just use green or black duct tape to decorate them. You just need to be sure you cover all the pool noodle foam as elegantly as possible.
Once you have everything covered, add it to the basket starting at one end. Use hot glue to attach the handles. If you want, you can make a bow with a decorative ribbon on the side of the basket.
Step five
After filling the inside of the basket with tissue paper, you’ve reached the most fun step of all. Once you have the basket almost finished, you can put in some gifts for the newborn. For example, you can put in some pacifiers, socks, diaper cream, baby wipes, plastic spoons, etc.
At this point, you just need to worry about spreading out the objects so you can use the space available as efficiently as possible.
To finish, remember that making a diaper basket as a gift is very simple. You just need to follow a few steps and you’ll be ready to welcome a new baby, whether yours or someone else’s.
On top of that, you’ll enjoy making it. As you’ll have seen, you can personalize the basket to the max. Let your imagination fly and surprise yourself with a creative craft!
This text is provided for informational purposes only and does not replace consultation with a professional. If in doubt, consult your specialist.