How to Make a Homemade Kite for Children

Written and verified by the teacher Samanta Ruiz
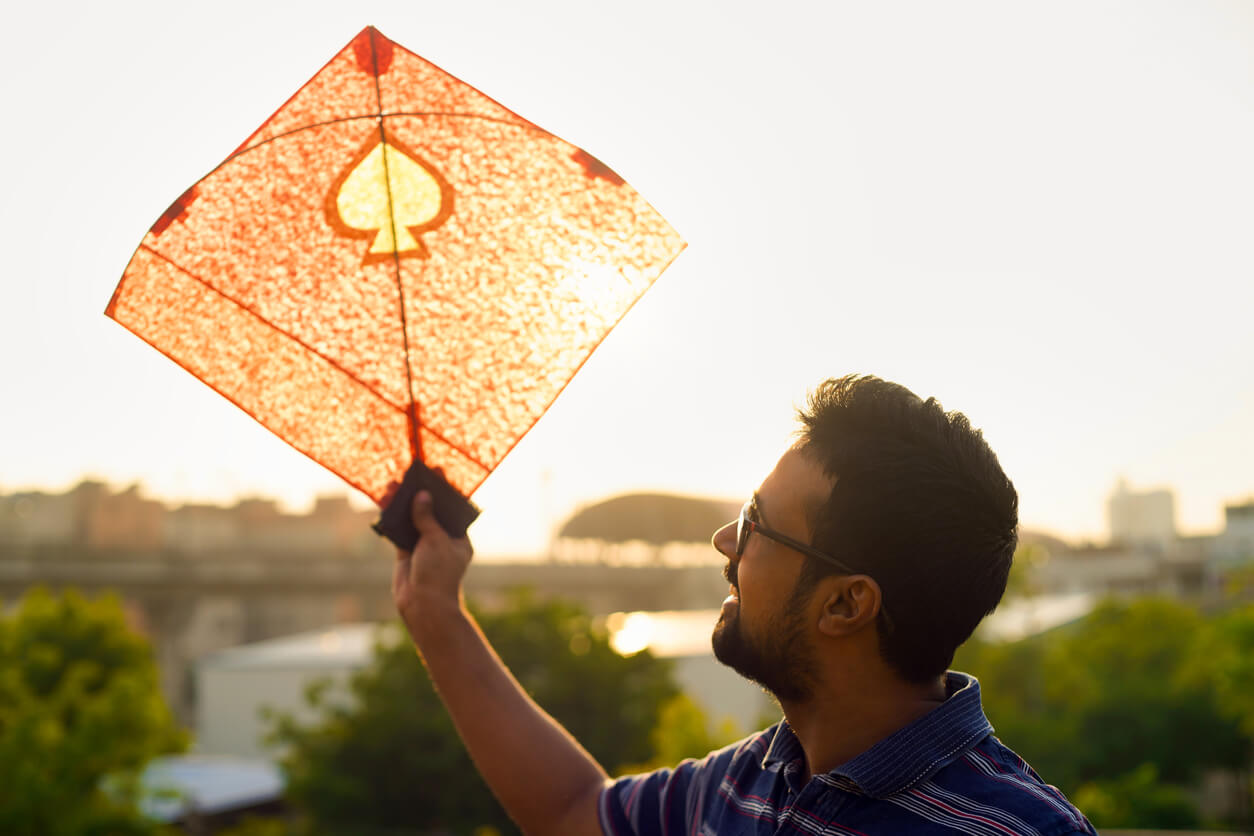
Kites are a toy that combines fascination, colors, science, and childhood memories. Surely, we all wanted to have one when we were kids and that desire is still alive in today’s generations. If you want to share that endearing emotion with your child, learn how to make a homemade kite for kids and enjoy flying it together as a family!
On a nice afternoon at home, get ready to make a colorful and fun family craft, then go outdoors and let your kite soar.
How to make a homemade kite for children?
Kites come in various shapes; there are simple ones and also more elaborate ones, but what’s essential is that the design must be perfect so that it has enough strength to take flight and stay in the air.
The parts of the kite are the following:
- Sail: This is the paper or plastic body.
- Bridle: These are the tensioners that allow the kite to take shape and “inflate” when it takes flight.
- Structure: This is formed by the spar and the crossbar. It’s made of light material, such as aluminum, balsa wood, bamboo, or cane.
- Line: A string that connects the kite to the person handling it.
- Tail: The part that gives your homemade kite stability.
- Reel: A device for threading the line that allows the kite to be raised and lowered safely.
The materials used to build homemade kites are very varied. Here’s a guide for what you’ll need:
Materials:
- Thin bamboo sticks, slats, or reeds
- String
- Scissors
- Pencil
- Ruler
- Tissue paper or a plastic bag
- Adhesive tape
- String
- Polyethylene tape
Step-by-step instructions:
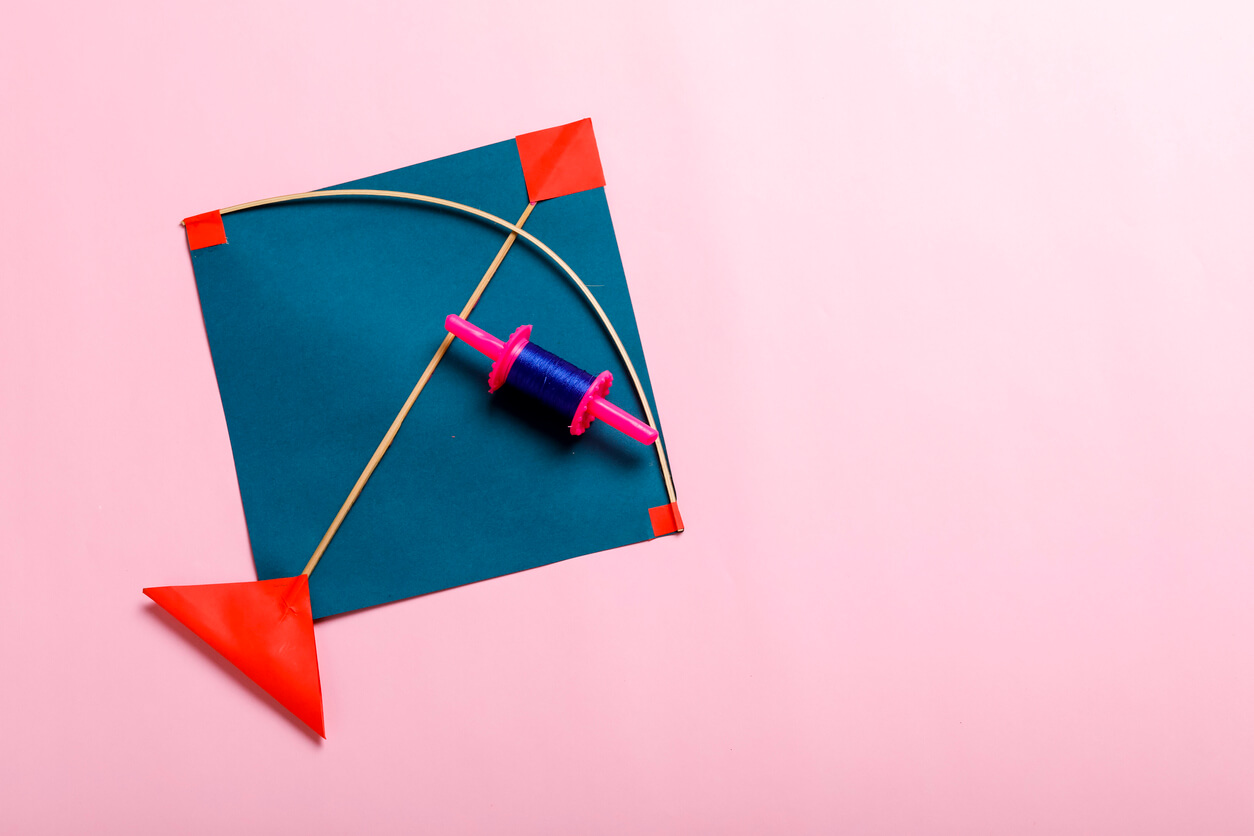
- Cut two sticks, one that measures 20 inches, which will be the horizontal bar, and another that measures 12 inches, which will be the crossbar.
- Tie them together tightly with a piece of string to form a cross.
- Place the cross of sticks on top of the unfolded paper or plastic bag and draw the shape of the kite, joining the four ends of the tied sticks with straight lines.
- Cut out the kite shape.
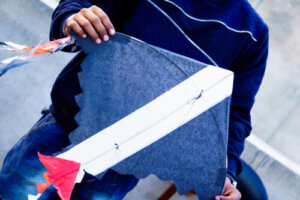
- With masking tape, glue the cut sheet to the structure at the four ends of the sticks.
- You now have the body or sail of the kite. Now you have to design the bridle. To do this, cut two pieces of thread, tie them to the spars and join them at the height of the center of the cross.
- At that junction, you have to attach the line, which is the very long string with which you’ll handle your kite.
- Glue polyethylene ribbons around the perimeter as decoration, and then, from the lower end of the spar, attach the tail. These can be long strips of plastic or paper at least 5 times the length of the kite.
- If you want, make drawings or put stickers with glitter to make your homemade kite even more impressive. But be careful not to decorate it with anything that will add weight.
- Now you know how to make a homemade kite!
Tips for flying a kite
Once the kids have their homemade kite finished, the best place to fly it is at the beach or in an open field. Avoid areas with trees, buildings, or mountainous terrain. It’s essential that there’s light to moderate wind and that you do the following:
- Unfold the kite so that the tail doesn’t get tangled in the line.
- Your child should stand facing into the wind with the kite up.
- Walk backward about 20 paces extending the line.
- On the count of 3, give a tug and simultaneously release and let the kite fly.
- Once you feel the kite hold in the air, slowly release the line from the reel and let it go higher.
The origin of kites
It’s believed that Asian countries such as Indonesia, China, and Japan flew the first kites as a form of signaling. Legend has it that it was Marco Polo who met them on his travels to the East and took them to Europe, where they quickly became popular. They even reached the Spanish colonies in America.
A personalized homemade kite
One of the advantages of making this traditional toy at home is that you can customize the design and have a unique and exclusive model to fly when you go on vacation to the countryside or to the beach.
Now that you know how to make a homemade kite, just ask your child what colors they want and let your imagination fly together! The sky’s the limit.
Kites are a toy that combines fascination, colors, science, and childhood memories. Surely, we all wanted to have one when we were kids and that desire is still alive in today’s generations. If you want to share that endearing emotion with your child, learn how to make a homemade kite for kids and enjoy flying it together as a family!
On a nice afternoon at home, get ready to make a colorful and fun family craft, then go outdoors and let your kite soar.
How to make a homemade kite for children?
Kites come in various shapes; there are simple ones and also more elaborate ones, but what’s essential is that the design must be perfect so that it has enough strength to take flight and stay in the air.
The parts of the kite are the following:
- Sail: This is the paper or plastic body.
- Bridle: These are the tensioners that allow the kite to take shape and “inflate” when it takes flight.
- Structure: This is formed by the spar and the crossbar. It’s made of light material, such as aluminum, balsa wood, bamboo, or cane.
- Line: A string that connects the kite to the person handling it.
- Tail: The part that gives your homemade kite stability.
- Reel: A device for threading the line that allows the kite to be raised and lowered safely.
The materials used to build homemade kites are very varied. Here’s a guide for what you’ll need:
Materials:
- Thin bamboo sticks, slats, or reeds
- String
- Scissors
- Pencil
- Ruler
- Tissue paper or a plastic bag
- Adhesive tape
- String
- Polyethylene tape
Step-by-step instructions:
- Cut two sticks, one that measures 20 inches, which will be the horizontal bar, and another that measures 12 inches, which will be the crossbar.
- Tie them together tightly with a piece of string to form a cross.
- Place the cross of sticks on top of the unfolded paper or plastic bag and draw the shape of the kite, joining the four ends of the tied sticks with straight lines.
- Cut out the kite shape.
- With masking tape, glue the cut sheet to the structure at the four ends of the sticks.
- You now have the body or sail of the kite. Now you have to design the bridle. To do this, cut two pieces of thread, tie them to the spars and join them at the height of the center of the cross.
- At that junction, you have to attach the line, which is the very long string with which you’ll handle your kite.
- Glue polyethylene ribbons around the perimeter as decoration, and then, from the lower end of the spar, attach the tail. These can be long strips of plastic or paper at least 5 times the length of the kite.
- If you want, make drawings or put stickers with glitter to make your homemade kite even more impressive. But be careful not to decorate it with anything that will add weight.
- Now you know how to make a homemade kite!
Tips for flying a kite
Once the kids have their homemade kite finished, the best place to fly it is at the beach or in an open field. Avoid areas with trees, buildings, or mountainous terrain. It’s essential that there’s light to moderate wind and that you do the following:
- Unfold the kite so that the tail doesn’t get tangled in the line.
- Your child should stand facing into the wind with the kite up.
- Walk backward about 20 paces extending the line.
- On the count of 3, give a tug and simultaneously release and let the kite fly.
- Once you feel the kite hold in the air, slowly release the line from the reel and let it go higher.
The origin of kites
It’s believed that Asian countries such as Indonesia, China, and Japan flew the first kites as a form of signaling. Legend has it that it was Marco Polo who met them on his travels to the East and took them to Europe, where they quickly became popular. They even reached the Spanish colonies in America.
A personalized homemade kite
One of the advantages of making this traditional toy at home is that you can customize the design and have a unique and exclusive model to fly when you go on vacation to the countryside or to the beach.
Now that you know how to make a homemade kite, just ask your child what colors they want and let your imagination fly together! The sky’s the limit.
All cited sources were thoroughly reviewed by our team to ensure their quality, reliability, currency, and validity. The bibliography of this article was considered reliable and of academic or scientific accuracy.
- http://personales.upv.es/ctorras/quinventfa/fitxes/ficha01.PDF
- https://www.batoco.org/bibliotoco/files/Especia01.pdf
- https://www.viaje-a-china.com/cultura/cometas-chinas.htm
This text is provided for informational purposes only and does not replace consultation with a professional. If in doubt, consult your specialist.