Craft Ideas to Welcome the Winter Season

Today, we want to suggest a series of crafts to welcome the winter season. Through them, you’ll be able to show children the elements that are so representative of this time of year. Are you ready to get started?
One of the best ways for children to learn is through play. And one way to play in a totally didactic way is through crafts. Crafts make children’s imagination com to life and, at the same time, develop their artistic side. If, in addition to these two factors, children learn new concepts, then you’re looking at one of the best possible activities they can do.
Craft ideas to welcome the winter season
Mural of winter clothes
This winter craft is intended for the youngest members of your household, ages three and up. With it, they’ll be able to discover the type of clothing that they should use during the coldest season of the year: winter.
The mural will also represent the most common weather this time of year: snow. To make this mural you’ll need the following:
- Cardboard or colored sheets of paper
- Glue
- Cotton
- Scissors
The first step will be to draw two trees on both sides, totally bare, because in winter the leaves of the trees have fallen. Second, you’ll draw a white line from one tree to another. This line will simulate the clothesline that you’ll hang your clothes on. Of course, you can also use string or ribbon if you want.
Next, it’ll be time to choose the clothes that you’ll include in the mural. For example, a hat, scarf, gloves, jacket, and any other articles of winter clothing that you can think of. Finally, you can attach small cotton balls to the cardboard to simulate snow. And now, your mural’s ready to welcome the winter season.
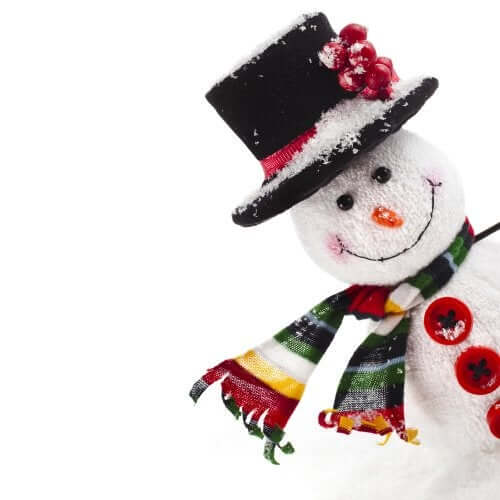
Snowman
As we said before, snow is very characteristic of this season. For that reason, making snowmen when snow covers your yard is one of the things that families love to do most this time of year. To create your own snowman, you’ll need:
- A small plastic bottle, including the cap
- Cotton balls
- Yarn in several different colors
Make sure the bottle is empty and dry. Then, fill it all the way up with cotton balls. The next steps will be to use orange yarn to create the nose of the snowman and another color to create a scarf. That way, you’ll make sure your snowman doesn’t get cold!
You can also create two eyes for the snowman by drawing two circles on a sheet of paper and painting two black dots on them. Cut them out, glue them to your snowman, and you’re all set!
Snowflakes
As we all know, Christmas takes place during the winter season. So, another thing that you and your little ones can do to welcome the winter season is to make Christmas decorations. In this case, we want to suggest making snowflake that you can use to decorate your home once you’re finished. For this activity, you’ll need the following.
- Four popsicle sticks
- White acrylic paint
- Blue glitter
- A blue ribbon
The idea here is to create the snowflake using popsicle sticks. To do this, first you must paint the sticks white and sprinkle them with blue glitter.
Once you’ve painted then, then you must glue two of them in the shape of a cross. Then, glue two more on top in the shape of an X. The last step will be to place the blue ribbon on the back of the flake so that you can hang it from your Christmas tree. This decoration will make you feel like you’re in the middle of the Frozen movie!
Mittens for keeping your hands warm: One of the funnest crafts to welcome the winter season
As we’ve been saying since the beginning, cold and winter are completely intertwined. Therefore, little ones will be able to create their own personalized mittens and display this craft as a decoration when the season arrives. For this craft, you’ll need:
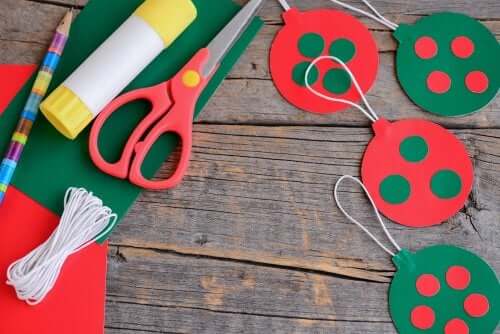
- Colored construction paper
- Scissors
- Glue
- Pom-poms, sequins, or other decorative elements
First of all, you’ll have to cut out the shape of a mitten from your construction paper in whatever color you want. Then, stick the shape onto another different colored piece of construction paper. The second step will be to decorate the mitten. Here, you can use whatever materials you have at home. For example, beads, glitter glue, pom-poms in different colors, sequins, etc.
This is a very simple craft designed for younger children who’ll have a fun time enjoying this activity with their families.
Today, we want to suggest a series of crafts to welcome the winter season. Through them, you’ll be able to show children the elements that are so representative of this time of year. Are you ready to get started?
One of the best ways for children to learn is through play. And one way to play in a totally didactic way is through crafts. Crafts make children’s imagination com to life and, at the same time, develop their artistic side. If, in addition to these two factors, children learn new concepts, then you’re looking at one of the best possible activities they can do.
Craft ideas to welcome the winter season
Mural of winter clothes
This winter craft is intended for the youngest members of your household, ages three and up. With it, they’ll be able to discover the type of clothing that they should use during the coldest season of the year: winter.
The mural will also represent the most common weather this time of year: snow. To make this mural you’ll need the following:
- Cardboard or colored sheets of paper
- Glue
- Cotton
- Scissors
The first step will be to draw two trees on both sides, totally bare, because in winter the leaves of the trees have fallen. Second, you’ll draw a white line from one tree to another. This line will simulate the clothesline that you’ll hang your clothes on. Of course, you can also use string or ribbon if you want.
Next, it’ll be time to choose the clothes that you’ll include in the mural. For example, a hat, scarf, gloves, jacket, and any other articles of winter clothing that you can think of. Finally, you can attach small cotton balls to the cardboard to simulate snow. And now, your mural’s ready to welcome the winter season.
Snowman
As we said before, snow is very characteristic of this season. For that reason, making snowmen when snow covers your yard is one of the things that families love to do most this time of year. To create your own snowman, you’ll need:
- A small plastic bottle, including the cap
- Cotton balls
- Yarn in several different colors
Make sure the bottle is empty and dry. Then, fill it all the way up with cotton balls. The next steps will be to use orange yarn to create the nose of the snowman and another color to create a scarf. That way, you’ll make sure your snowman doesn’t get cold!
You can also create two eyes for the snowman by drawing two circles on a sheet of paper and painting two black dots on them. Cut them out, glue them to your snowman, and you’re all set!
Snowflakes
As we all know, Christmas takes place during the winter season. So, another thing that you and your little ones can do to welcome the winter season is to make Christmas decorations. In this case, we want to suggest making snowflake that you can use to decorate your home once you’re finished. For this activity, you’ll need the following.
- Four popsicle sticks
- White acrylic paint
- Blue glitter
- A blue ribbon
The idea here is to create the snowflake using popsicle sticks. To do this, first you must paint the sticks white and sprinkle them with blue glitter.
Once you’ve painted then, then you must glue two of them in the shape of a cross. Then, glue two more on top in the shape of an X. The last step will be to place the blue ribbon on the back of the flake so that you can hang it from your Christmas tree. This decoration will make you feel like you’re in the middle of the Frozen movie!
Mittens for keeping your hands warm: One of the funnest crafts to welcome the winter season
As we’ve been saying since the beginning, cold and winter are completely intertwined. Therefore, little ones will be able to create their own personalized mittens and display this craft as a decoration when the season arrives. For this craft, you’ll need:
- Colored construction paper
- Scissors
- Glue
- Pom-poms, sequins, or other decorative elements
First of all, you’ll have to cut out the shape of a mitten from your construction paper in whatever color you want. Then, stick the shape onto another different colored piece of construction paper. The second step will be to decorate the mitten. Here, you can use whatever materials you have at home. For example, beads, glitter glue, pom-poms in different colors, sequins, etc.
This is a very simple craft designed for younger children who’ll have a fun time enjoying this activity with their families.
This text is provided for informational purposes only and does not replace consultation with a professional. If in doubt, consult your specialist.