How to Make a Your Own Bookmark

Learning how to create your own bookmark is one of the first steps when it comes to entering the formidable world of reading. It’s a world full of adventures, dreams, and hopes, where little ones can develop their imagination, all while they acquire knowledge and enjoy themselves.
Reading silently is one of humanity’s unique passions. For this reason, it’s important to convey the pleasure of having a good book in hand, especially in an age full of technologies.
How about planting the first seed of your personal library with your child? If this idea excites you, then don’t miss out on the designs we have in store!
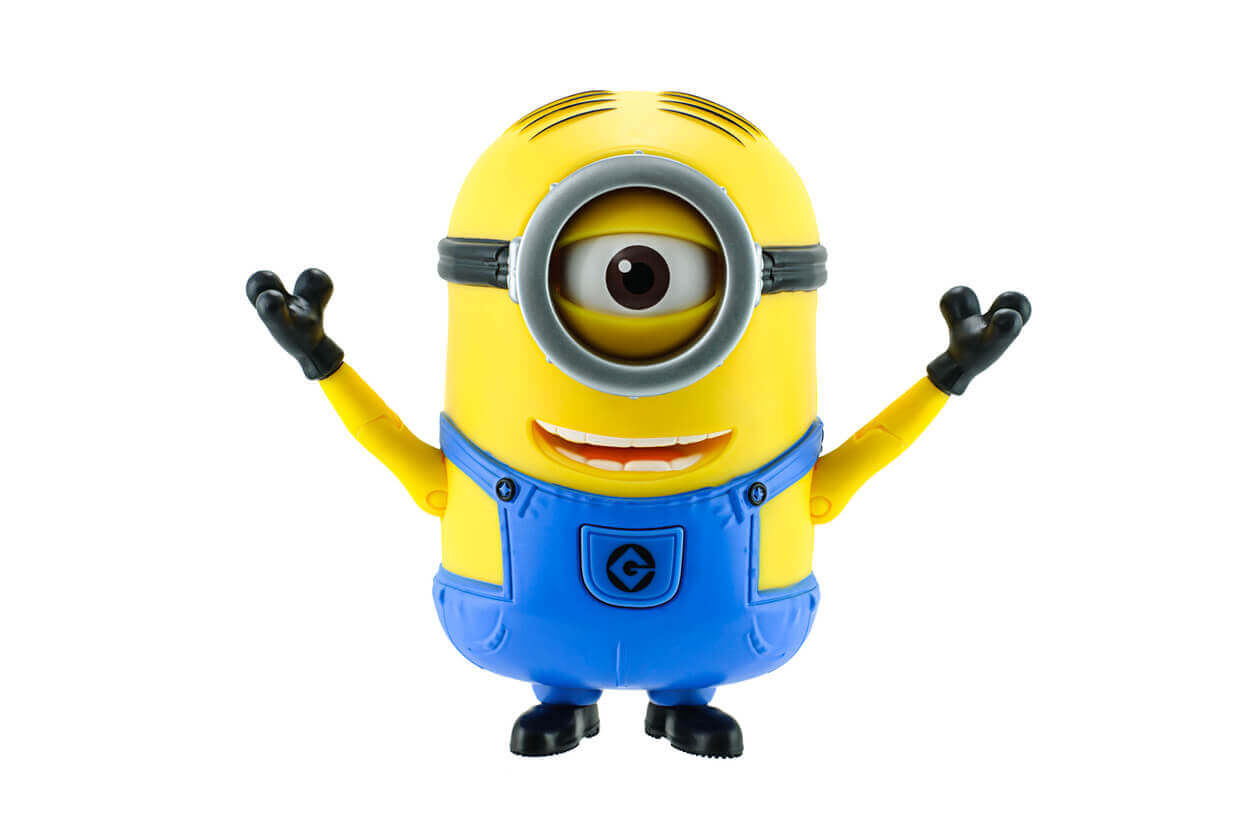
How to make your own bookmark with a Minions theme
Favorite animated characters can be the perfect decoration for your child’s first bookmark.
The materials you’ll need:
Basic supplies are easy to find, but they require adult supervision and assistance.
- Yellow, blue, white, and black card stock or construction paper
- A paper puncher
- A pair of scissors
- Glue
- A string tassel
Step-by-step instructions:
Take note of the instructions in order to give life to this creation:
- Cut out a yellow cardboard rectangle and a smaller blue one. The first will be the body of the minion.
- Next, glue the blue rectangle below the yellow one. Keep in mind that this has to be the character’s overalls. Also, cut two blue strips to simulate the straps of the clothing.
- Once you have this done, cut out the mouth according to the expression you want to give your figure. For the eye or eyes, cut out a black cardboard circle, a smaller white one, and finally, a tiny black circle that will be the iris.
- Then, with the help of the paper puncher, make a small opening in the upper part and tie the string tassel.
Your bookmark’s ready! Surely, the little ones in your house will love to start reading with this faithful friend. In addition, they can choose the minion that they like the most to give it the look they prefer. The key is originality.
Make your own bookmark with confetti
For older children, we’ve got a more modern and homemade option, based on current mobile phone cases.
The materials you’ll need
- Colored cards
- A cellophane bag
- Confetti and glitter
- Glue
- A pair of scissors
Step-by-step instructions:
Invite your children to create this original and super simple craft together:
- First, fill the cellophane bag with confetti or glitter. This way, the materials can move freely when shaken.
- Then, seal the bag with glue and cut out a cardboard frame to glue around it.
A heart-shaped children’s bookmark
As a study by the Technical University of Ambato affirms, the maternal heartbeat accompanies the child from the womb. Therefore, we suggest that this same design also accompany your child in their first steps in the world of reading. Also, you can reserve this bookmark for their favorite book.
Gather the following materials:
- EVA rubber
- Decorative paper
- Glue
- A pair of scissors
- A pencil
Step-by-step instructions:
Gather the supplies and help your child complete this task, especially if they’re not yet proficient in using scissors.
- Draw two hearts on the EVA rubber, one twice the size of the other. Then cut them out.
- Use the smaller heart as a template to cut one out of the decorative paper of the same size.
- Glue the top of the smaller heart onto the larger one and let it dry until done.
Teach your child to make their own bookmark with flowers
The following bookmarks are for nature lovers. If your little one is interested in living things and their care, then without a doubt, this creation is ideal for them. In addition, it’s a perfect option to do in spring. Their classmates will want to know how they did it!
What you’ll need:
- White cardboard
- Glue
- A pair of scissors
- Flowers
- Transparent contact paper
- Color ribbon
- A paper puncher
Step-by-step instructions:
It may take a few days to manufacture, but it’ll be well worth it!
- Pick flowers and let them dry inside a heavy book.
- Then, cut the white cardstock into a rectangular shape and glue the flowers on top of it.
- Once this is done, wrap the rectangle using the transparent contact paper to make it last.
- Finally, with a hole puncher, make a small opening in the upper part of the bookmark and thread the colored ribbon to indicate how far you’ve come in the story.
Also read: How to Make Flower Headbands for Girls
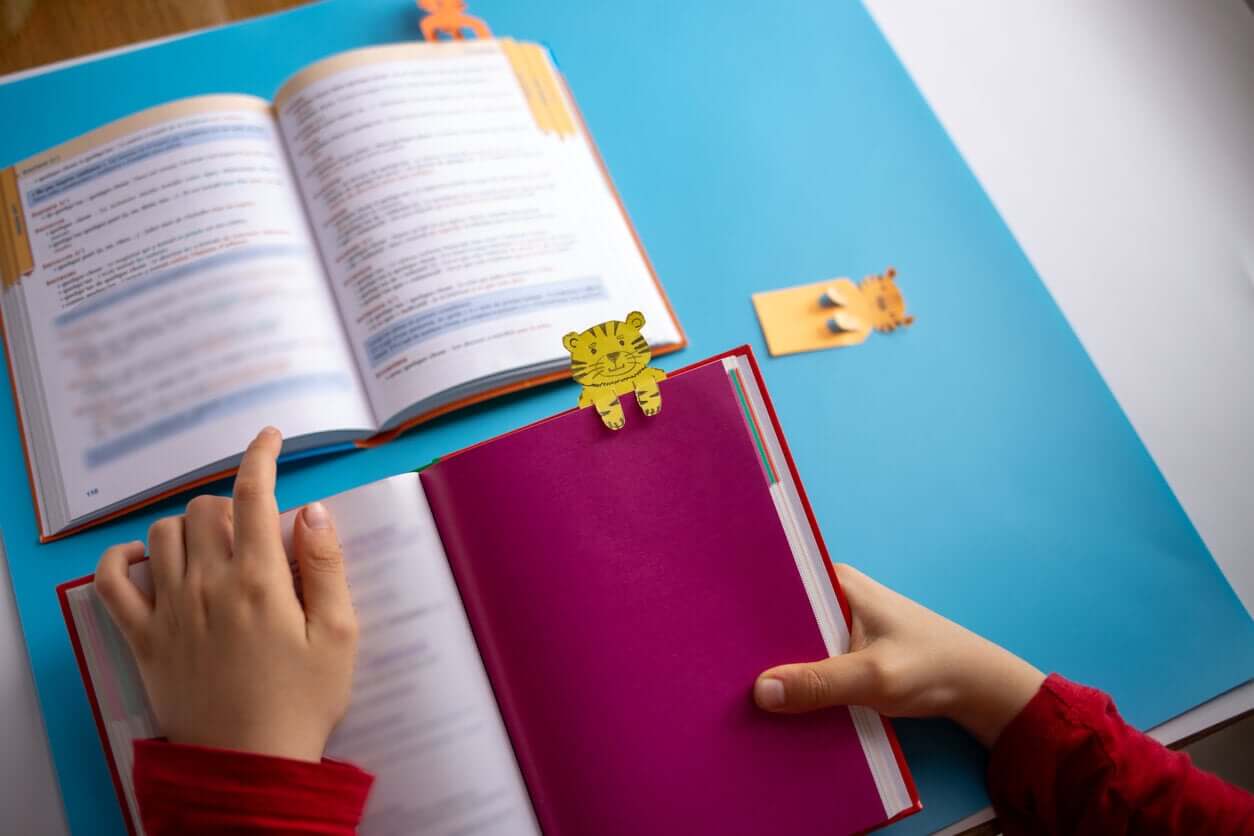
Bookmarks for children with funny animals
In line with the above idea, we’ve got a perfect idea if your child loves to draw.
To make this bookmark, you just have to print a drawing template with the little one’s favorite animal. Then, ask them to draw and paint it. Next, cut out the shape and laminate it to last over time. And now you’ve got one of the most beautiful bookmarks of your life!
A passion for reading begins with a children’s bookmark
The mastery of literature and the taste for reading are part of the qualities that children should develop during childhood. With this affirmation, Jorge Orlando Melo (university professor honored by the Cervantes Institute) describes the special importance of introducing young people to the world of reading.
In this article, we’ve given you the first step to achieving it, with the creation of your first personal bookmark. Tomorrow, your little ones will thank you for opening this door for them.
Learning how to create your own bookmark is one of the first steps when it comes to entering the formidable world of reading. It’s a world full of adventures, dreams, and hopes, where little ones can develop their imagination, all while they acquire knowledge and enjoy themselves.
Reading silently is one of humanity’s unique passions. For this reason, it’s important to convey the pleasure of having a good book in hand, especially in an age full of technologies.
How about planting the first seed of your personal library with your child? If this idea excites you, then don’t miss out on the designs we have in store!
How to make your own bookmark with a Minions theme
Favorite animated characters can be the perfect decoration for your child’s first bookmark.
The materials you’ll need:
Basic supplies are easy to find, but they require adult supervision and assistance.
- Yellow, blue, white, and black card stock or construction paper
- A paper puncher
- A pair of scissors
- Glue
- A string tassel
Step-by-step instructions:
Take note of the instructions in order to give life to this creation:
- Cut out a yellow cardboard rectangle and a smaller blue one. The first will be the body of the minion.
- Next, glue the blue rectangle below the yellow one. Keep in mind that this has to be the character’s overalls. Also, cut two blue strips to simulate the straps of the clothing.
- Once you have this done, cut out the mouth according to the expression you want to give your figure. For the eye or eyes, cut out a black cardboard circle, a smaller white one, and finally, a tiny black circle that will be the iris.
- Then, with the help of the paper puncher, make a small opening in the upper part and tie the string tassel.
Your bookmark’s ready! Surely, the little ones in your house will love to start reading with this faithful friend. In addition, they can choose the minion that they like the most to give it the look they prefer. The key is originality.
Make your own bookmark with confetti
For older children, we’ve got a more modern and homemade option, based on current mobile phone cases.
The materials you’ll need
- Colored cards
- A cellophane bag
- Confetti and glitter
- Glue
- A pair of scissors
Step-by-step instructions:
Invite your children to create this original and super simple craft together:
- First, fill the cellophane bag with confetti or glitter. This way, the materials can move freely when shaken.
- Then, seal the bag with glue and cut out a cardboard frame to glue around it.
A heart-shaped children’s bookmark
As a study by the Technical University of Ambato affirms, the maternal heartbeat accompanies the child from the womb. Therefore, we suggest that this same design also accompany your child in their first steps in the world of reading. Also, you can reserve this bookmark for their favorite book.
Gather the following materials:
- EVA rubber
- Decorative paper
- Glue
- A pair of scissors
- A pencil
Step-by-step instructions:
Gather the supplies and help your child complete this task, especially if they’re not yet proficient in using scissors.
- Draw two hearts on the EVA rubber, one twice the size of the other. Then cut them out.
- Use the smaller heart as a template to cut one out of the decorative paper of the same size.
- Glue the top of the smaller heart onto the larger one and let it dry until done.
Teach your child to make their own bookmark with flowers
The following bookmarks are for nature lovers. If your little one is interested in living things and their care, then without a doubt, this creation is ideal for them. In addition, it’s a perfect option to do in spring. Their classmates will want to know how they did it!
What you’ll need:
- White cardboard
- Glue
- A pair of scissors
- Flowers
- Transparent contact paper
- Color ribbon
- A paper puncher
Step-by-step instructions:
It may take a few days to manufacture, but it’ll be well worth it!
- Pick flowers and let them dry inside a heavy book.
- Then, cut the white cardstock into a rectangular shape and glue the flowers on top of it.
- Once this is done, wrap the rectangle using the transparent contact paper to make it last.
- Finally, with a hole puncher, make a small opening in the upper part of the bookmark and thread the colored ribbon to indicate how far you’ve come in the story.
Also read: How to Make Flower Headbands for Girls
Bookmarks for children with funny animals
In line with the above idea, we’ve got a perfect idea if your child loves to draw.
To make this bookmark, you just have to print a drawing template with the little one’s favorite animal. Then, ask them to draw and paint it. Next, cut out the shape and laminate it to last over time. And now you’ve got one of the most beautiful bookmarks of your life!
A passion for reading begins with a children’s bookmark
The mastery of literature and the taste for reading are part of the qualities that children should develop during childhood. With this affirmation, Jorge Orlando Melo (university professor honored by the Cervantes Institute) describes the special importance of introducing young people to the world of reading.
In this article, we’ve given you the first step to achieving it, with the creation of your first personal bookmark. Tomorrow, your little ones will thank you for opening this door for them.
All cited sources were thoroughly reviewed by our team to ensure their quality, reliability, currency, and validity. The bibliography of this article was considered reliable and of academic or scientific accuracy.
-
Galarza García MG. La estimulación prenatal y su influencia en el desarrollo sensorial de los niños de 1 a 3 años en los centros de desarrollo infantil de la ciudad de Ambato en el segundo trimestre de enero – marzo 2011. 2013. Disponible en: http://repositorio.uta.edu.ec/handle/123456789/3966
- Melo JO. Importancia de la lectura (y la literatura) para la educación y la formación de los niños y el desarrollo social. Boletín Cultural y Bibliográfico. 1997;34(46):161–6. Disponible en: https://publicaciones.banrepcultural.org/index.php/boletin_cultural/article/view/1650
This text is provided for informational purposes only and does not replace consultation with a professional. If in doubt, consult your specialist.